Vespa Fork Bearings
The main clue to whether you
may need to replace your fork bearings is a shudder while braking from
higher speeds. This may also be caused by the front brake shoes or an
ovaled hub, but a distinct shudder is usually due to the fork bearings
failing, or at least the securing nuts may be loose. Either way here's
how to remove and replace the fork bearings.
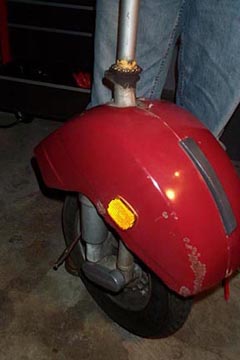
The following instructions are
for a P series bike. 1960s bikes are pretty much the same but here's a 60s forks page if you prefer to look at
images that are more like your particular bike.
You'll need:
- A 13mm socket & driver.
- A Phillips screwdriver.
- Pliers or a small
adjustable wrench.
- An 11mm socket or wrench
(front brake).
- A headset retaining ring
removal tool (or a flathead screwdriver & mallet) or some
vice-grips.
- Grease.
- Something to set under the
bike to get the front wheel about 18" off the ground.
The first step is to remove
the front brake lever pivot. When the forks are removed the speedo
cable and the front brake cable will still be connected to the fork
assembly, so they need to be disconnected. Use an 11mm wrench to loosen
the cable where it attaches to the front wheel hub arm so that the
cable will be slack. There is a small nut on the bottom side of the
pivot which should be held with pliers while the screw is unscrewed
from above.
 Â Â
The next step is to remove the
headset top and disconnect the speedo and front brake cables. Remove
the four screws (two either side) from the underside of the headset to
allow the top to be removed. The speedo cable will hold the headset top
down - don't try and pry it up! Locate the point where the speedo cable
enters the fork tube just below the front mudguard, and feed it in as
much as possible. This should allow the clearance needed to lift the
headset top, reach in, and unscrew the speedometer cable from the
speedo unit.
With this removed, the headset
top can be flipped backwards with all the other connection intact.
Allow enough slack to remove
the front brake lever. It can be unhooked from the cable end. Be sure
to save the two small washers that go on the top and bottom of the
front brake lever pivot. Note how the cable terminates against the stop
within the lever pivot casting as you'll need to replace it in the same
way later.
With a little work, the front
brake lever cable outer can be pushed through the throttle tube and
pulled clear to where it enters the top of the fork tube. Now it is
time to remove the headset.
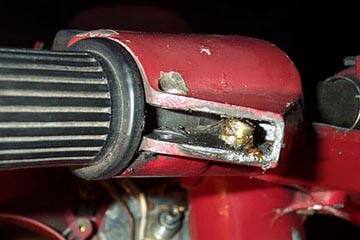
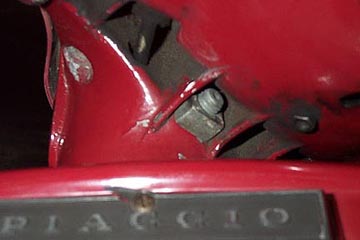
A single pinch bolt attaches
the headset to the top of the fork tube. The fork tube has a cut out
that the bolt passes through so to the bolt must be removed completely
to allow the removal of the headset. Use a 13mm socket and driver to
loosen and remove the bolt.
The pinch bolt has a square
nut hidden under the headset which will drop out once the bolt is
removed. It fits in to a special slot so it can't rotate which makes it
much easier to loosen and tighten the pinch bolt. Keep this in a safe
place once it drops out.
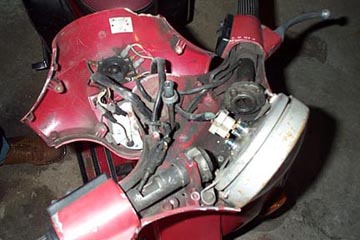
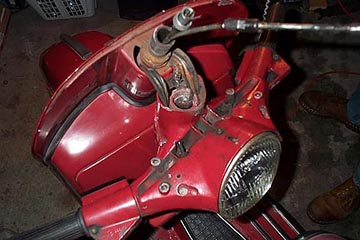
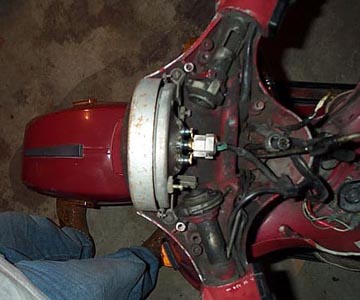
There is usually enough slack
in the control cables and electrical wires to get the headset off the
fork tube without any further disconnections. To get the headset off
once the pinch bolt is removed, stand with a leg on either side of the
front mudguard and turn the headset from left to right while lifting
upwards. You'll need to do this quite a few times, but each time the
headset will raise just a bit. The mudguard may try to turn so brace it
between your legs.
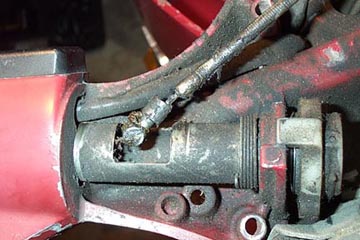
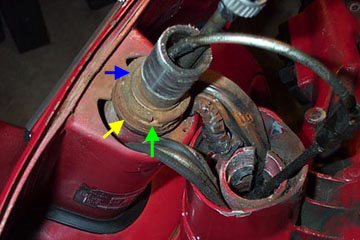
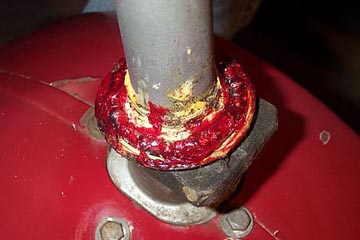
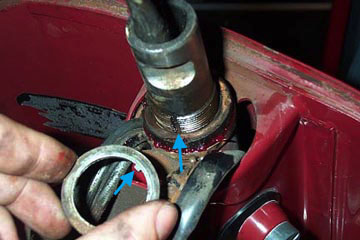
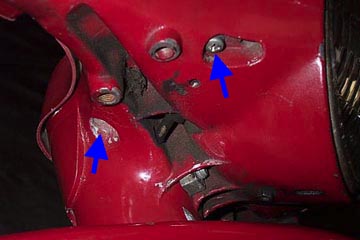
The forks are locked in place
by a top locking ring (blue arrow), a plain locking washer (green
arrow) and a lower locking ring/race (yellow arrow). There is a special
tool that is used to remove these rings but I find that a hammer and
large flathead screwdriver do the trick pretty well.
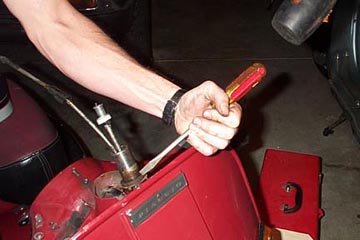
Turn the mudguard all the way
to the left, put the slot of the flathead in to one of the grooves in
the upper retaining ring, and tap it with a mallet. Please note:
that this picture shows me tightening the ring - to loosen it you'd be
turning it anti-clockwise. Usually these rings are not very tight, but
if they are as sad as the ones I have pictured here, you may want to
use some WD40 in the grooves to ease them up. Once the first ring is
off the washer can be lifted off. At this point you need to get some
help to get the front wheel of the bike about 18" off the ground so
that you'll have enough room to get the forks out of the frame.
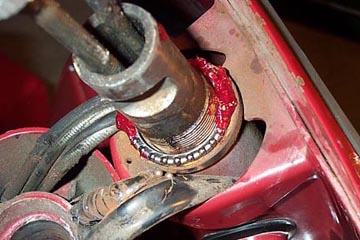
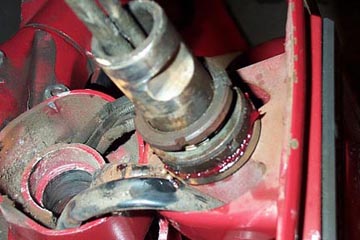
The bearings above are
supposed to be held in place by a race, not loose, but the one here
have been destroyed somehow and all the bearings are rusty. Start to
loosen the bottom ring and have someone support the forks from below.
Once the final ring is removed the entire front wheel, mudguard, and
fork tube should now drop out the bottom of the frame.
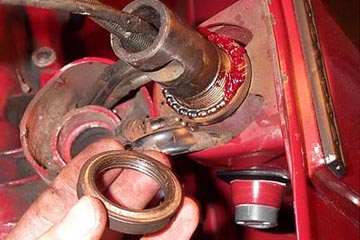
The lower fork bearings are
also in a race. To replace them just slip the old bearings off the fork
tube. Inspect the race mounted on the fork tube - this is the area that
the bearings make contact with the fork tube - to be sure it is not
pitted. If it is, it can be removed with a blowtorch to heat it, and by
tapping it from below until it comes off the fork tube.
Also inspect the area where
the bearings meet the frame at the top and bottom, and clean them
thoroughly. It is unlikely these will be a problem but replacement
parts can be bought and fit into the frame. I've never done it myself
so I am not sure exactly how to get the old one out as it is a pressed
steel fitting.
Fit the new lower bearing and
smear it with grease. Refit the fork tube in the frame and temporarily
fit one of the top locking rings so the forks don't fall out while you
get the front wheel back on the ground.
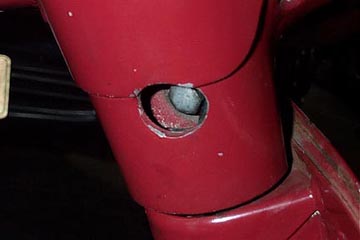
When the front wheel is back
on the ground, remove the temporary locking ring and slide the well
greased top bearing in place...
..followed by the retaining
ring/top race. With weight on the front wheel, tighten this race as
tight as you can by hand and then only about a quarter turn using the
flathead and mallet method. It doesn't have to be super tight as the
locking washer will stop it from loosening.
Refit the locking washer.
There is a tab on the washer that must fit in to a groove in the fork
tube....
...and lastly, refit the upper
locking ring and tighten it as tight as you can (within reason). This
is also a good time to re-wrap any electrical wires that may have
become chaffed over the life of the bike.
Once you have set the headset
loosely on the fork tube, refit the pinch bolt with the lock washer at
the bolt head end, and the square nut in the underside headset slot.
Tighten the bolt until there is friction between the fork tube and the
headset but each can still move independently of each other. Do your
best to make a visual alignment of the front wheel and the headset and
fully tighten the pinch bolt. You can come back later and make any fine
adjustments after a road test.
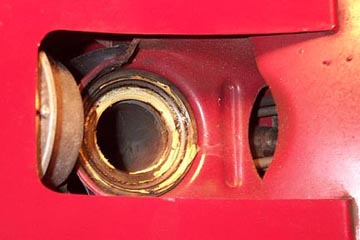
Thread the front brake cable
back in to position. Be sure that the small "top hat" engages in the
stop inside the lever mount casting, and refit the lever itself with
the top and bottom washers. Connect the bottom of the brake cable to
the hub arm and test it to make sure it the front brake grabs within
the range of the lever pull.
Reconnect the speedo drive and
position the headset top above the headset bottom. Pull on the speedo
cable where it exits the forks under the front mudguard to ease the
headset top into position. Refit the four headset top bolts and take
the bike for a test drive. If you find the bike weaves, the top lock
ring is too tight. If the front brake still causes shuddering under
braking then either the locking ring is not tight enough, or the brake
shoes are rubbing intermittently due to a warped hub surface.
|